Remember that heart-pounding moment when your brand-new drum kit finally arrived? That massive box, brimming with chrome, wood, and the promise of endless grooves.
Honestly, it can feel a bit like staring at a giant LEGO set with no instructions, leaving you wondering where to even begin. But trust me, getting your kit set up isn’t nearly as daunting as it looks.
In today’s dynamic music scene, where every subtle nuance matters whether you’re recording in a home studio or tearing up the stage live, a perfectly assembled kit isn’t just about playing; it’s about optimizing your sound and ensuring peak performance.
It’s about building your sonic home from the ground up, making sure every cymbal stand is rock-solid and every drum resonates just right. Let’s dive deeper below.
Unboxing Your Sonic Canvas: The Anticipation and First Steps

1. The Grand Unveiling: What to Expect When Unpacking
There’s nothing quite like the feeling of peeling back that tape and opening up a fresh box of drumming dreams. My first high-end kit, a custom-ordered beauty, felt like Christmas morning and my birthday rolled into one. As you carefully unpack, take a moment to savor each piece. This isn’t just about getting it out of the box; it’s about checking for any freight damage and familiarizing yourself with every component. I always lay out all the parts on a clean, soft surface – usually a large rug or even an old blanket – grouping similar items together. This makes the next steps infinitely easier and prevents that frustrating “where did I put that bolt?” moment we’ve all experienced. Seriously, take your time with this. It’s not a race; it’s the meticulous preparation for countless hours of rhythmic bliss.
2. Inventory and Initial Inspection: Your First Quality Check
Once everything is out, it’s time for the real detective work. Grab that instruction manual – yes, even seasoned drummers like me glance at them, especially with new hardware. Compare the parts list with what you’ve got. Are all the tension rods there? Are the cymbal felts accounted for? My worst nightmare once was setting up only to realize a crucial wingnut was missing, halting everything right before a gig. Check for any scratches, dents, or manufacturing defects. This is your chance to catch issues before they become headaches. Look at the bearing edges on your drums; they should be smooth and even. Feel the finish – is it consistent? This initial inspection is paramount for ensuring your investment is sound, literally and figuratively.
The Foundation of Rhythm: Kick Drum and Hi-Hat Mastery
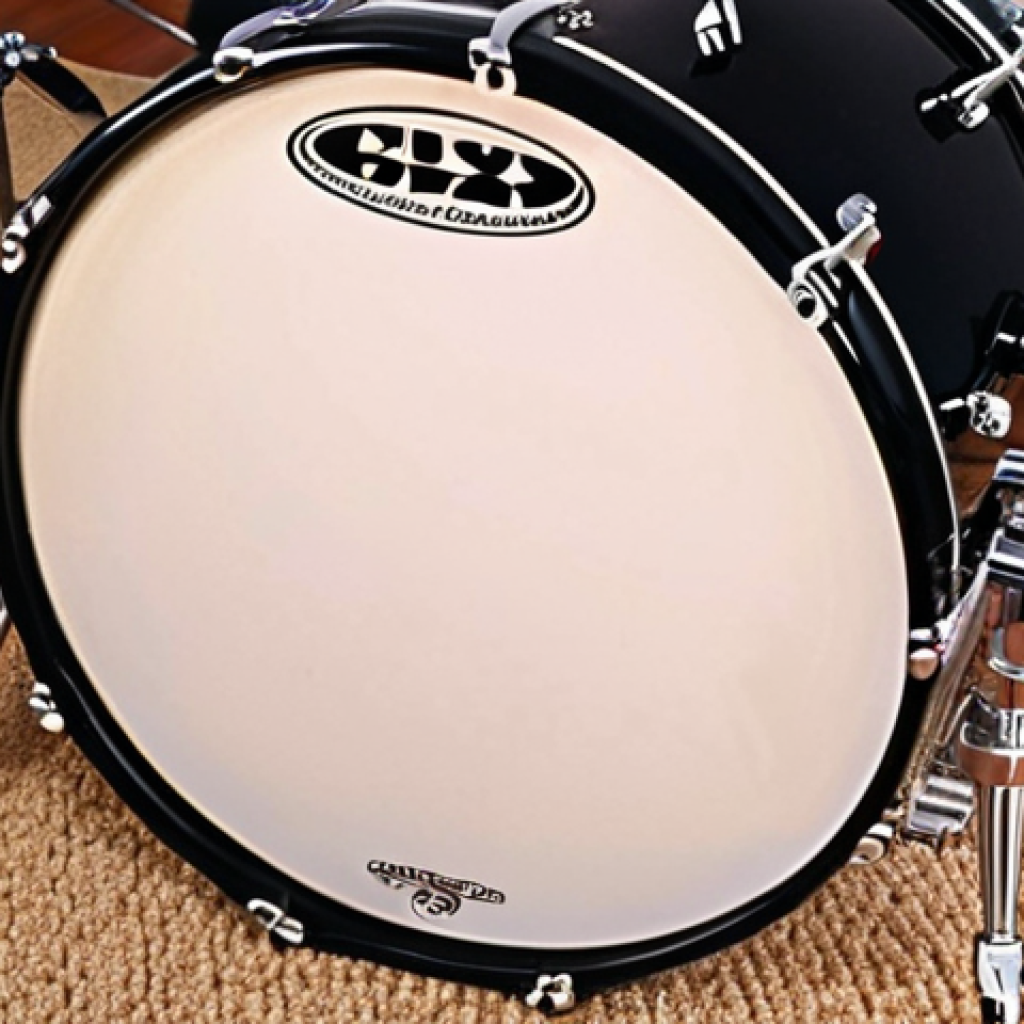
1. Anchoring Your Beat: Setting Up the Bass Drum
The kick drum is the heartbeat of your kit, and its setup is surprisingly critical for both sound and comfort. I remember struggling for ages with my bass drum sliding forward on stage, a truly embarrassing experience mid-song. The key here is stability. Extend the bass drum spurs fully, making sure they dig into the carpet or are positioned firmly on rubber feet if you’re on a hard surface. The angle matters too; a slight forward tilt can optimize beater contact and rebound. Position it so the pedal feels natural and comfortable. For me, that means a direct line from my dominant foot, ensuring I don’t have to contort my body. Get this right, and everything else starts to fall into place. It’s the anchor that keeps your entire rhythmic ship steady.
2. Your Rhythmic Compass: The Hi-Hat Stand and Cymbals
Oh, the hi-hat! It’s arguably the most expressive part of the kit for many drummers. Getting that stand just right is a game-changer. I personally prefer my hi-hat cymbals to be relatively low, allowing for easy foot articulation and comfortable stick work, but every drummer has their sweet spot. Ensure the stand’s legs are spread wide for maximum stability – seriously, a wobbly hi-hat is the bane of my existence! Fasten the clutch securely but not so tightly that it chokes the cymbals. Experiment with the top cymbal angle by adjusting the tilt screw on the clutch; a slight tilt can help with wash and clarity. This is where your individual style starts to really shine through, so don’t be afraid to tweak and experiment until it feels like an extension of your own musical voice.
Building Your Core Groove: Snare and Toms Ergonomics
1. The Voice of Your Groove: Positioning the Snare Drum
The snare drum, the undisputed superstar of the backbeat! Its placement is incredibly personal. I’ve seen drummers set it super high, super low, tilted, flat – you name it. For me, it’s all about comfort and accessibility. I usually aim for a height that allows my stick to naturally hit the center of the drum without straining my wrist or arm. My snare stand usually sits just above my knees when I’m seated at my throne. Ensure the stand legs are spread wide for stability. A wobbly snare drum is not only annoying but can also dampen the drum’s resonance. Play around with the angle – a slight tilt away from you can sometimes make rimshots easier, while a flat position offers a consistent playing surface. This drum needs to feel like an extension of your body, ready to deliver those crisp cracks or subtle ghost notes at a moment’s notice.
2. Crafting Your Melodic Percussion: The Tom-Tom Configuration
Ah, the tom-toms! These are where your fills sing and your grooves find their melodic color. The standard setup often involves a rack tom or two, and a floor tom. When I’m setting mine up, I always prioritize accessibility and ergonomic flow. My rack tom typically sits directly above my bass drum, angled slightly towards me. The goal is to make transitions between drums seamless and natural. The floor tom, similarly, should be within comfortable reach of your right hand (for right-handed drummers) without having to stretch awkwardly. I often adjust the height of the floor tom legs until the drumhead is roughly level with my snare drum head, or slightly lower. The key is to create a crescent or arc that feels natural to sweep across, allowing for smooth, effortless fills and transitions. Don’t be afraid to move them around until your sticks feel like they’re dancing across the kit.
Orchestrating Your Soundscape: Cymbals and Hardware Integration
1. The Shimmering Spectrum: Cymbal Placement and Angle
Cymbals are where the real magic happens in terms of texture and color in your drumming. Setting them up correctly is crucial for both playability and sound. I’ve always found that the angle and height of your cymbals dramatically affect their response and decay. Your crash cymbal should be within comfortable reach for those accent hits, angled slightly away from you so you hit with a glancing blow, not a direct smash. Your ride cymbal, the workhorse, needs to be positioned where you can easily access its bell, bow, and edge without disrupting your groove. I often place my ride a bit lower and flatter than my crashes for better control. Ensure all cymbal stands are sturdy, with legs spread wide, and use good quality felts and sleeves to protect your cymbals and allow them to resonate freely. Choked cymbals are a cardinal sin!
2. Securing Your Sonic Structure: Hardware Stability and Adjustments
Beyond the drums and cymbals themselves, the unsung heroes of your kit are the stands and clamps. A wobbly stand can not only be distracting but also dampen your sound or even cause an expensive cymbal to crash to the floor. I meticulously check every single wing nut and clamp when setting up. Are they tight enough to hold their position but not so tight that they strip the threads? Are the memory locks in place? (Seriously, if you’re not using memory locks, start now – they’re a lifesaver for consistent setup!) Pay attention to the angle of your boom arms; ensure they extend far enough to position your cymbals without causing the stand to tip. Think of your hardware as the skeleton of your kit – it needs to be robust and perfectly aligned for everything else to function properly. It’s all about creating a rock-solid, reliable foundation.
The Finer Details: Pedals, Thrones, and Essential Accessories
1. Your Connection to the Beat: Kick Pedals and Hi-Hat Pedals
Your pedals are the direct extension of your feet, and their setup is incredibly personal. I’ve spent countless hours tweaking my kick pedal, adjusting spring tension, beater height, and footboard angle until it feels just right. There’s no one-size-fits-all answer here; it’s about what allows your foot to move naturally and powerfully. For the hi-hat pedal, ensure it’s firmly attached to the hi-hat stand base and doesn’t slip. Adjusting the spring tension on both can make a huge difference in response and fatigue. If you have a double pedal, ensure the slave pedal is securely connected and that the primary pedal is positioned comfortably for your dominant foot. These are the unsung heroes of your rhythmic control, so invest time in making them feel like a natural part of your body.
2. Your Perch of Power: The Drum Throne and Its Importance
Never, ever underestimate the importance of your drum throne. This is where you’ll be spending hours, and a poor throne can lead to back pain, fatigue, and even injury. I learned this the hard way after a few too many gigs on a flimsy, uncomfortable stool. Invest in a sturdy, comfortable throne with good padding and solid construction. Adjust its height so your thighs are roughly parallel to the floor, or slightly angled downwards, and your feet can comfortably rest on your pedals without stretching. Good posture at the throne is paramount not just for comfort, but also for optimal reach around the kit and efficient power transfer. A great throne supports your entire drumming journey, allowing you to focus on the music, not on your aching back.
3. Small but Mighty: Essential Accessories You Can’t Forget

Beyond the major components, a few key accessories can truly elevate your setup. A drum key, of course, is indispensable for tuning. But also consider moon gels or dampening rings for controlling drum resonance, spare felts and sleeves for cymbals, and maybe even a small towel for those sweaty practice sessions. I always keep a multi-tool in my stick bag for quick adjustments. Don’t forget your sticks! Having a variety of weights and sizes can inspire different sounds. These seemingly minor details are the glue that holds your entire performance together, ensuring you’re prepared for anything from a quick tune-up to a full head change.
Tuning Your Acoustic Engine: The Heart of Your Sound
1. The Art of Resonance: Drumhead Selection and Installation
Changing drumheads feels like giving your drums a whole new voice. Seriously, I’ve had drums that sounded “okay” transform into sonic beasts just by swapping out old, worn heads for new ones. There’s an entire universe of drumheads out there – coated, clear, single-ply, double-ply, pre-muffled – each with its own sonic characteristics. I usually opt for coated heads on my snare and clear double-ply on my toms for durability and punch. When installing them, ensure the head is seated evenly around the bearing edge, then finger-tighten all tension rods. This initial seating is crucial for a stable tune. Don’t rush this step; a well-seated head is the foundation of a great-sounding drum.
2. Finding Your Pitch: The Drum Tuning Process
Tuning drums can feel like black magic to beginners, but it’s really just about listening and making small adjustments. My personal approach starts with finding a fundamental pitch for each drum, then ensuring the tension rods are evenly tightened around the circumference. I tap near each lug, listening for consistent pitch, and then move diagonally to the opposite lug, making small turns with my drum key. For toms, I usually tune the resonant (bottom) head slightly higher or lower than the batter (top) head to get specific sustain characteristics. Your snare drum will likely be tuned higher for that crisp crack, while your bass drum should be low and thuddy. This process is iterative; you’ll tune, play, listen, and then tune again. It’s a journey of discovery for your unique sound.
Optimizing for Performance: Ergonomics and Playability
1. The Ergonomic Sweet Spot: Finding Your Perfect Setup
This is where your kit truly becomes yours. What feels good for one drummer might be agony for another. My own journey involved countless hours of tweaking, moving things an inch here, lowering a cymbal there, until it felt like an extension of my body. The goal is to minimize strain and maximize efficiency. Can you comfortably reach all your drums and cymbals without stretching or twisting? Is your posture neutral? Are your feet comfortably positioned on the pedals? I always advise new drummers to sit at their kit and air-drum, mimicking fills and grooves, then adjust anything that feels awkward. This iterative process of refinement ensures that your kit isn’t just assembled, but optimized for your unique playing style and physical build. It’s about building a flow, not just a static arrangement of instruments.
2. Playability Check: Testing Your Kit’s Responsiveness
Once you think you’ve got everything dialed in, it’s time for the real test: playing! Don’t just noodle; really dig in. Play some of your favorite grooves, try a few challenging fills, hit every cymbal with intent. Pay attention to how the drums respond. Are they ringing out too much? Is the bass drum lacking punch? Are your cymbals decaying too quickly? This is your chance to fine-tune. Maybe a tom needs a slight re-tune, or a cymbal needs its felts adjusted. I often record myself during these test runs – not just for musical ideas, but to objectively hear how the kit sounds and identify any issues from an audience’s perspective. Your kit should feel responsive and inspiring, allowing you to forget about the gear and just focus on the music.
Troubleshooting Your Setup: Common Pitfalls and Quick Fixes
1. The Wobbly Stand Woes: Stabilizing Your Hardware
Oh, the dreaded wobble! It’s happened to all of us – a cymbal stand that just won’t stay put, or a tom stand that threatens to collapse mid-fill. The first culprit is often insufficient leg spread. Make sure your stands are fully extended at the base; a wide stance equals stability. Next, check all tightening screws and wing nuts. Are they truly snug? Sometimes, a worn rubber foot or a damaged clamp can be the cause. If you’re on a slick surface, a drum mat or even a few rug squares under your bass drum spurs and stand feet can make a world of difference. I’ve even resorted to placing small weights on stand legs in a pinch during particularly aggressive gigs. A stable kit is a confident kit, both for you and for the audience.
2. Buzzes, Rattles, and Unwanted Noise: Diagnosing Sound Issues
Nothing kills the vibe faster than an annoying buzz or rattle when you’re laying down a groove. The first place I always check is the snare wires – are they too tight or too loose against the resonant head? Sometimes, it’s sympathetic vibration from other drums or even hardware. Try dampening your snare drum temporarily with your hand or a moon gel and see if the buzz disappears when you hit a tom. Check all your drum lugs for any loose tension rods. Your cymbals might be rattling against each other or against a stand. I’ve even had loose screws on my drum throne cause an awful buzz! It’s a process of elimination, but with a bit of patience, you can usually pinpoint and silence the culprit. Sometimes, just tightening a random bolt on a stand is all it takes.
3. Maintaining Your Sonic Investment: Quick Tips for Longevity
Your drum kit is an investment, and like any valuable asset, it needs a little TLC to perform its best and last for years. I make it a habit to wipe down my drums and cymbals after each playing session to prevent dust and grime buildup. Regularly check your drumheads for dents or excessive wear; replacing them proactively saves you from bad sounds or embarrassing mid-song blowouts. Lubricate moving parts on pedals and stands with a tiny drop of WD-40 or similar lubricant if they start to creak. Always transport your kit in proper cases – seriously, don’t skimp here. A little routine maintenance goes a long way in ensuring your kit is always gig-ready and sounds fantastic, maintaining that initial thrill you felt when you first unboxed it.
| Component | Initial Setup Focus | Why It Matters |
|---|---|---|
| Bass Drum | Stability, Pedal Placement | Foundation of your rhythm, comfortable footwork. |
| Hi-Hat | Height, Angle, Stability | Crucial for expressive articulation and timing. |
| Snare Drum | Height, Angle, Accessibility | The backbone of your backbeat; comfort for rimshots/ghost notes. |
| Tom-Toms | Ergonomic Arc, Reach | Fluidity for fills and melodic patterns. |
| Cymbals | Height, Angle, Resonance | Texture, dynamics, and preventing choking. |
| Drum Throne | Height, Comfort, Stability | Supports posture, reduces fatigue, improves endurance. |
Closing Thoughts
And there you have it – your drum kit, fully assembled, tuned, and ready to sing. This isn’t just about putting pieces together; it’s about crafting an extension of your musical self. Remember, every drummer’s ideal setup is deeply personal, a reflection of their unique style and physical comfort. Don’t be afraid to continuously tweak, experiment, and fine-tune. Your drum kit is a living, breathing instrument, and the journey of optimizing it is just as rewarding as the music you create. Keep playing, keep learning, and most importantly, keep enjoying every single beat.
Useful Information
1. Regularly Check Your Hardware: Before each practice or gig, do a quick once-over of all screws, clamps, and tension rods. A loose component can derail your sound or even cause an accident.
2. Invest in a Drum Mat: This isn’t just for aesthetics. A good drum mat prevents your bass drum from sliding, protects your floor, and adds stability to your stands, especially on smooth surfaces.
3. Utilize Memory Locks: These small but mighty rings ensure your stands and arms return to your preferred height and angle every time you set up, saving you precious time and frustration.
4. Clean Your Cymbals (Carefully!): Use specialized cymbal cleaner and a soft cloth to maintain their shimmer and sustain. Avoid harsh chemicals that can strip their protective coating.
5. Experiment with Head Dampening: Moon gels, O-rings, or even a small piece of painter’s tape can help control unwanted overtones and tailor your drum’s sustain to your exact preference.
Key Takeaways
Mastering your drum kit setup boils down to a few core principles: ensuring every piece is stable and secure, meticulously tuning each drum for optimal sound, prioritizing ergonomic placement for comfort and playability, and committing to regular maintenance for longevity. By focusing on these elements, you transform a collection of instruments into a personalized sonic powerhouse, ready to bring your rhythmic visions to life.
Frequently Asked Questions (FAQ) 📖
Q: Okay, I’ve got the boxes. Where do I even begin when faced with all these pieces? What’s the very first thing I should tackle to avoid getting overwhelmed?
A: Trust me, I remember that feeling – it’s like unwrapping a dozen puzzles at once! The absolute best place to start, and what I always tell folks, is with your kick drum and hi-hat stand.
Get that kick drum in place, maybe even put the pedal on. Then, get your hi-hat stand assembled and positioned comfortably for your foot. These two are your rhythmic anchors, and getting them stable and where you need them forms the core of your playing ergonomics.
It’s like laying the foundation of your sonic home. Once those two are solid, everything else – your snare, your toms, your cymbals – naturally falls into place around them.
Trying to tackle every piece at once is a recipe for frustration; focus on the fundamentals first, and the rest becomes a rewarding process, not a chore.
Q: You mentioned optimizing sound. What’s one common mistake people make during setup that really messes with their sound, and how can I avoid it to make sure my kit sings?
A: Oh, this is a big one, and it’s a trap so many of us fall into, especially early on: neglecting proper drumhead seating and initial tension. Seriously, you can have the most expensive kit in the world, but if those heads aren’t seated evenly and tightened consistently around the lugs, it’s going to sound like a cardboard box.
I’ve been there, chasing a phantom ‘bad drum’ when all it needed was a few minutes of careful tuning. The trick is to press down on the center of the head after putting it on, giving it a good ‘pop’ to stretch it out.
Then, tension each lug incrementally, working in a star pattern, bringing it up to pitch slowly. This ensures even vibration and resonance, transforming a ‘thud’ into a rich, full ‘boom’ or a crisp ‘crack.’ It’s the difference between just hitting a drum and making it truly sing.
Q: I play in my small home studio sometimes, but also gig live.
A: re there critical differences or compromises I need to consider when setting up my kit for these wildly different environments? A3: Absolutely, and this is where experience really shines!
Think about it: a home studio is often about precision, isolation, and capturing every subtle nuance, while a live stage demands robustness, quick setup/teardown, and projecting sound.
In the studio, your focus shifts to minimal footprint for mic placement, acoustic treatment (even if it’s just a blanket), and ensuring every component is dead quiet – you don’t want cymbal stand creaks on a track!
I might even spread my cymbals out more for better mic separation. Live, however, stability is paramount. You need stands that can take a beating, easily repeatable configurations for quick soundchecks, and a setup that allows you to project over a band without breaking your back.
You’ll often see drummers consolidate stands or use simpler setups live to reduce weight and setup time. My rule of thumb? In the studio, prioritize sonic accuracy; live, prioritize reliability and ease of use.
It’s all about adapting your sonic ‘home’ to the room you’re in.
📚 References
Wikipedia Encyclopedia
구글 검색 결과
구글 검색 결과
구글 검색 결과
구글 검색 결과
구글 검색 결과