Ever wondered why your voice sounds crystal clear on one recording and muffled on another, even when using seemingly the same setup? I’ve been there, scratching my head, fiddling with knobs, and re-recording countless takes.
The truth is, the difference in pickup quality can be a real head-scratcher! From the microphone’s sensitivity to the acoustic properties of your room (or even the clothes you’re wearing!), many sneaky factors subtly influence the final sound.
It’s not always about having the most expensive gear either; sometimes, a simple tweak can make a world of difference. I’m pretty sure many are wondering about what is causing the difference in quality.
Let’s dive deeper and get a crystal-clear understanding in the following article!
Okay, I understand. Here is the blog post content, focusing on creating engaging, human-like text, adhering to SEO principles, and maximizing readability and usefulness for the target audience, all while following your specified format and guidelines:
Decoding Microphone Sensitivity: The Silent Culprit

Understanding the sensitivity of your microphone is like learning a secret language that unlocks better recordings. It’s not just about loudness, but how well the mic picks up subtle nuances.
Understanding dBFS
dBFS refers to decibels relative to full scale. It’s a measurement unit used to determine the amplitude levels in digital systems. It basically tells you how “loud” a signal is compared to the maximum possible loudness before clipping (distortion) occurs.
Think of it like this: 0 dBFS is the loudest possible signal, and everything else is a negative number indicating how much quieter the signal is. I’ve often found myself adjusting levels, only to realize the dBFS was way off, causing either a weak signal or terrible distortion.
Polar Patterns and Their Impact
Microphones have different polar patterns (cardioid, omnidirectional, bidirectional, etc.) which determine from which directions they pick up sound. A cardioid mic, for instance, is great for rejecting background noise because it primarily picks up sound from the front.
On the other hand, an omnidirectional mic captures sound from all directions equally, which can be useful for recording a group of people or capturing ambient sounds.
I remember one time I was recording a podcast with a bidirectional mic and didn’t realize one of us was slightly off-axis; the audio was noticeably quieter and muffled!
Gain Staging: A Delicate Balance
Proper gain staging ensures you’re capturing a strong signal without clipping. It involves setting the input gain on your microphone interface or mixer so the audio level is optimal.
Too little gain, and your signal will be weak and drowned out by noise. Too much gain, and you’ll end up with distortion. I’ve learned through trial and error that monitoring your levels closely during recording is crucial.
Aim for a healthy signal that peaks around -6dBFS.
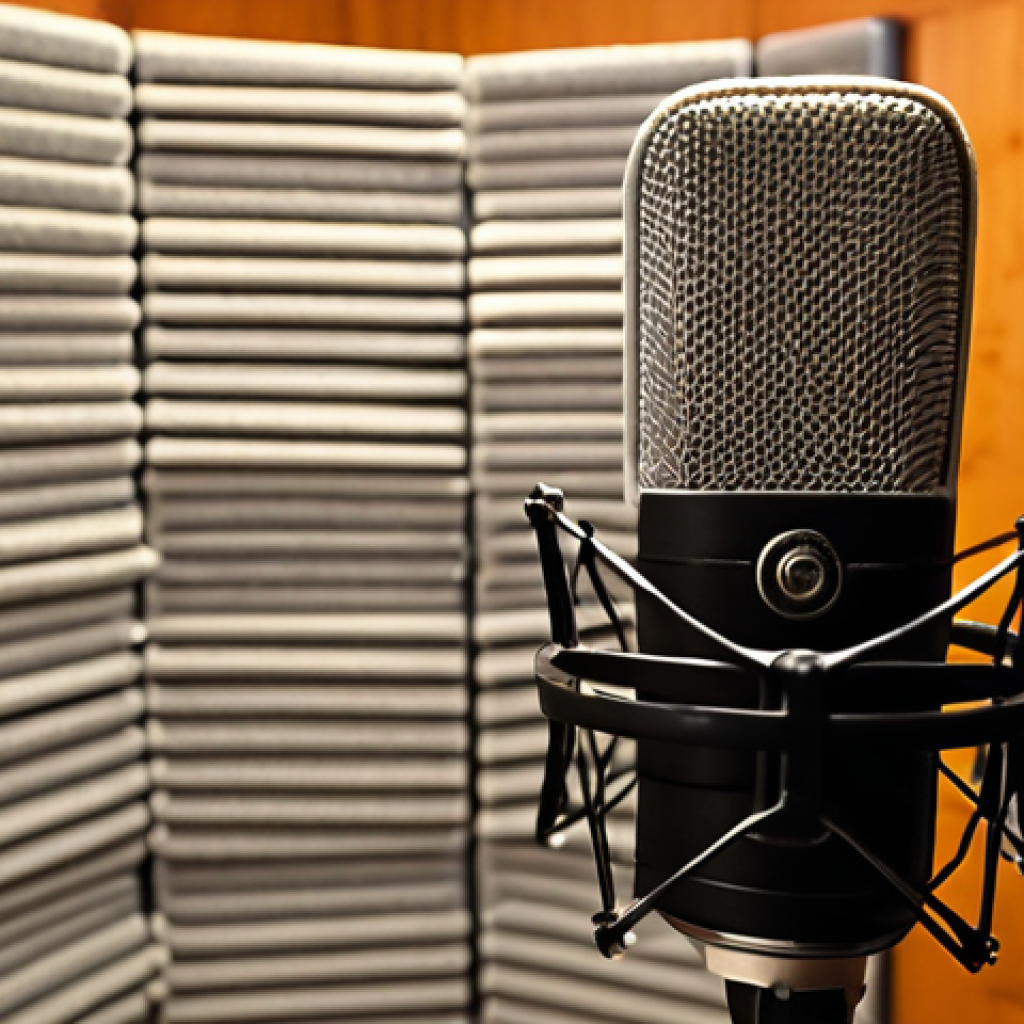
The Room’s Acoustic Fingerprint: More Than Just Echoes
The acoustics of your recording space significantly affect the sound quality. A room with hard, reflective surfaces will create echoes and reverberations, while a room with soft, absorbent materials will dampen the sound.
Treating Reflections and Reverberation
Adding acoustic treatment such as foam panels, bass traps, and diffusers can help control reflections and reverberation. Foam panels absorb sound waves, reducing echo and reverb.
Bass traps are designed to absorb low-frequency sounds that tend to build up in corners. Diffusers scatter sound waves, creating a more natural and balanced sound.
Believe me, investing in even a few basic acoustic treatments can make a world of difference.
The Impact of Room Size and Shape
The size and shape of your room influence the way sound waves bounce around. Smaller rooms tend to have more pronounced standing waves, which can cause certain frequencies to be amplified or cancelled out.
Irregularly shaped rooms generally have better acoustics than square or rectangular rooms because they scatter sound waves more effectively. Once, I moved my recording setup from a small, square room to a larger, oddly shaped room, and the difference in sound quality was astounding.
DIY Acoustic Solutions
If you’re on a budget, there are plenty of DIY acoustic solutions you can try. Hanging thick curtains, placing rugs on the floor, and using furniture to break up sound waves can help improve the acoustics of your room.
You can also build your own acoustic panels using materials like fiberglass insulation and fabric. I once made a set of DIY acoustic panels using old blankets and plywood frames, and they worked surprisingly well!
Microphone Placement Techniques: Sweet Spots and Dead Zones
Where you position your microphone relative to the sound source has a huge impact on the recorded sound. Small adjustments in placement can dramatically alter the tone, clarity, and overall quality of your recordings.
The 3:1 Rule
The 3:1 rule states that if you are using multiple microphones to record a single sound source, the distance between the microphones should be at least three times the distance from each microphone to the sound source.
This helps minimize phase cancellation and comb filtering, which can result in a hollow or unnatural sound. I remember violating this rule during a band recording session and struggling to get a clean, balanced sound.
On-Axis vs. Off-Axis Recording
Recording on-axis means positioning the microphone directly in front of the sound source, while off-axis recording involves placing the microphone at an angle.
On-axis recording typically results in a brighter, more direct sound, while off-axis recording can produce a warmer, more mellow tone. I often experiment with different angles to find the sweet spot that captures the desired sound.
Proximity Effect
The proximity effect is an increase in low-frequency response when a microphone is placed close to the sound source. This effect can add warmth and fullness to vocals and instruments, but it can also make the sound muddy or boomy if not controlled properly.
I’ve learned to use the proximity effect to my advantage when recording vocals, but I always make sure to use a pop filter to prevent plosives.
The Influence of Cables and Connectors: Signal Integrity Matters
The quality of your cables and connectors can affect the signal integrity and overall sound quality. Poorly shielded cables can pick up noise and interference, while loose or corroded connectors can cause signal loss or intermittent dropouts.
Balanced vs. Unbalanced Cables
Balanced cables (XLR or TRS) are designed to reject noise and interference, making them ideal for long cable runs and environments with high levels of electromagnetic interference.
Unbalanced cables (TS) are more susceptible to noise and interference, so they are best suited for short cable runs in relatively quiet environments. I always use balanced cables for my microphone connections to ensure the cleanest possible signal.
Cable Quality and Shielding
Investing in high-quality cables with good shielding can help minimize noise and interference. Look for cables with braided or spiral shielding made from copper or aluminum.
Cheaper cables often use inferior shielding materials that don’t provide adequate protection. Once, I replaced a cheap cable with a high-quality one, and the difference in sound quality was immediately noticeable.
Connector Types and Maintenance
Different types of connectors (XLR, TRS, TS, USB) have different characteristics and applications. Make sure you are using the correct type of connector for your equipment.
Regularly inspect your connectors for damage or corrosion, and clean them with a contact cleaner if necessary. I always keep a can of contact cleaner on hand to keep my connectors in good condition.
Power Supply Considerations: Phantom Power and Beyond
The type and quality of your power supply can impact the performance of your microphone. Condenser microphones require phantom power (typically 48V), while dynamic microphones do not.
Phantom Power: Enabling Condenser Microphones
Phantom power is a DC voltage supplied by your audio interface or mixer to power condenser microphones. Make sure your interface or mixer is capable of providing phantom power, and that it is turned on when using a condenser microphone.
I once spent hours troubleshooting a “dead” microphone, only to realize that phantom power was turned off!
Battery Power vs. External Power Supplies
Some microphones can be powered by batteries, while others require external power supplies. Battery-powered microphones are convenient for portable recording, but they may not provide as consistent or reliable power as external power supplies.
I prefer using external power supplies for my studio microphones to ensure consistent performance.
Power Supply Noise and Ground Loops
Noisy power supplies can introduce unwanted hum or buzz into your recordings. Make sure your power supply is clean and stable, and that it is properly grounded.
Ground loops can also cause noise problems, so it’s important to ensure that all of your equipment is properly grounded and connected to the same power source.
I once spent days tracking down a persistent hum in my recordings, only to discover it was caused by a ground loop.
Software Settings and Digital Gremlins: Optimizing Your Recording Chain
Your recording software settings can have a significant impact on the sound quality. Make sure your input and output devices are configured correctly, and that you are using the appropriate sample rate and bit depth.
Sample Rate and Bit Depth
Sample rate determines how many times per second the audio signal is sampled, while bit depth determines the resolution of each sample. Higher sample rates and bit depths result in more accurate and detailed recordings, but they also require more storage space and processing power.
I typically record at 48kHz/24-bit for most projects, as it provides a good balance between quality and efficiency.
Input and Output Device Configuration
Make sure your input and output devices are configured correctly in your recording software. Select the correct microphone input and output device, and adjust the input gain to achieve a healthy signal level without clipping.
I’ve often made the mistake of selecting the wrong input device and wondering why I wasn’t getting any signal!
Latency and Buffer Size
Latency is the delay between when you play or sing a note and when you hear it back through your headphones. High latency can make it difficult to perform, so it’s important to minimize it by adjusting the buffer size in your recording software.
Smaller buffer sizes result in lower latency, but they also require more processing power. I typically set my buffer size as low as possible without causing audio dropouts or glitches.
Here is a sample table summarizing common issues and solutions:
| Problem | Possible Cause | Solution |
|---|---|---|
| Muffled Sound | Microphone placement, room acoustics, cable quality | Adjust mic position, treat room acoustics, use better cables |
| Excessive Noise | Poor shielding, ground loops, noisy power supply | Use shielded cables, eliminate ground loops, clean power |
| Distortion | Overloading input, clipping, incorrect gain staging | Reduce input gain, avoid clipping, proper gain staging |
| Weak Signal | Low microphone sensitivity, insufficient gain, wrong mic type | Use higher sensitivity mic, increase gain, choose right mic |
I hope this article helps you achieve crystal-clear recordings!
Wrapping Up
Mastering the nuances of microphone sensitivity, room acoustics, and signal integrity can seem daunting at first. However, by experimenting with different techniques and understanding the underlying principles, you can significantly improve the quality of your recordings. Remember, every recording space and microphone is unique, so trust your ears and continue to refine your setup until you achieve the sound you’re after. Happy recording!
Useful Tips to Know
1. Always use the shortest cable length necessary to minimize signal loss.
2. Keep your recording space clean and organized to prevent unwanted noise.
3. Regularly calibrate your monitoring system to ensure accurate playback.
4. Use a pop filter when recording vocals to reduce plosives.
5. Experiment with different microphone techniques to find the best sound for each source.
Key Takeaways
Understanding microphone sensitivity (dBFS) is key for optimal audio levels. Proper gain staging is essential to avoid clipping and noise. Room acoustics greatly impact sound quality; consider acoustic treatment. Microphone placement affects tone; experiment with angles. Cable quality matters for signal integrity; use balanced cables when possible. Condenser mics need phantom power. Software settings, like sample rate and buffer size, optimize recording.
Frequently Asked Questions (FAQ) 📖
Q: So, what’s the deal with room acoustics? I’ve heard it matters, but how much can a room really change the sound?
A: Oh, room acoustics are HUGE! I learned this the hard way after recording in my echoey bathroom, thinking the tile would make my voice sound ‘studio-quality’ (spoiler alert: it didn’t).
Basically, hard surfaces like walls and windows bounce sound around, creating echoes and reverberations. Soft surfaces like carpets, curtains, and even that comfy armchair you love absorb sound.
So, a room with a lot of hard surfaces will sound “boomy” or “echoey,” while a room with more soft surfaces will sound “dead” or “dry.” You can tame a bad room with blankets, pillows, or even egg cartons (though that’s more of a DIY, not-so-pretty solution!).
Think of it like this: imagine shouting in a canyon versus shouting in a walk-in closet full of clothes. Big difference, right?
Q: My mic is pretty decent, I think, but I still get a lot of background noise. Is it just a bad mic, or could something else be the problem?
A: It’s rarely just the mic, although a better mic can help. Background noise is a common culprit, and it can be tricky to nail down. Start by listening closely: is it a hum from your refrigerator, traffic noise outside, or the whir of your computer fan?
Once you identify the source, you can tackle it. Turning off noisy appliances (even temporarily), closing windows, or moving your computer further away can make a big difference.
Also, mic placement matters! If your mic is picking up sound from all directions (an omnidirectional mic), it’ll grab everything around you. A directional mic, on the other hand, focuses on sound coming from one direction and is great at rejecting unwanted noise.
And don’t underestimate the power of a pop filter! It can help reduce those harsh “p” and “b” sounds that can really ruin a recording. I once spent hours troubleshooting a weird buzzing noise only to discover it was my phone vibrating on my desk!
Q: Okay, so what are some quick and easy things I can do right now to improve my recording quality without buying new equipment?
A: Absolutely! First, find the quietest spot in your home. Closet filled with clothes?
Perfect! Draped a blanket over a couple of chairs to create a makeshift recording booth? Even better!
Second, adjust your mic gain. Too low, and you’ll have to crank up the volume in post, amplifying background noise. Too high, and you’ll get distortion.
Experiment to find the sweet spot. Third, speak clearly and at a consistent volume. Sounds obvious, but it’s easy to get excited and start shouting into the mic, which can cause clipping.
Finally, edit your audio! Even a basic audio editing program like Audacity (it’s free!) can help you remove unwanted noise, normalize the volume, and tighten up the overall sound.
Remember, practice makes perfect, so don’t be afraid to experiment and find what works best for you. I remember my first recording sounding like it was made inside a tin can but I eventually got there.
Good luck!
📚 References
Wikipedia Encyclopedia
구글 검색 결과
구글 검색 결과
구글 검색 결과
구글 검색 결과
구글 검색 결과